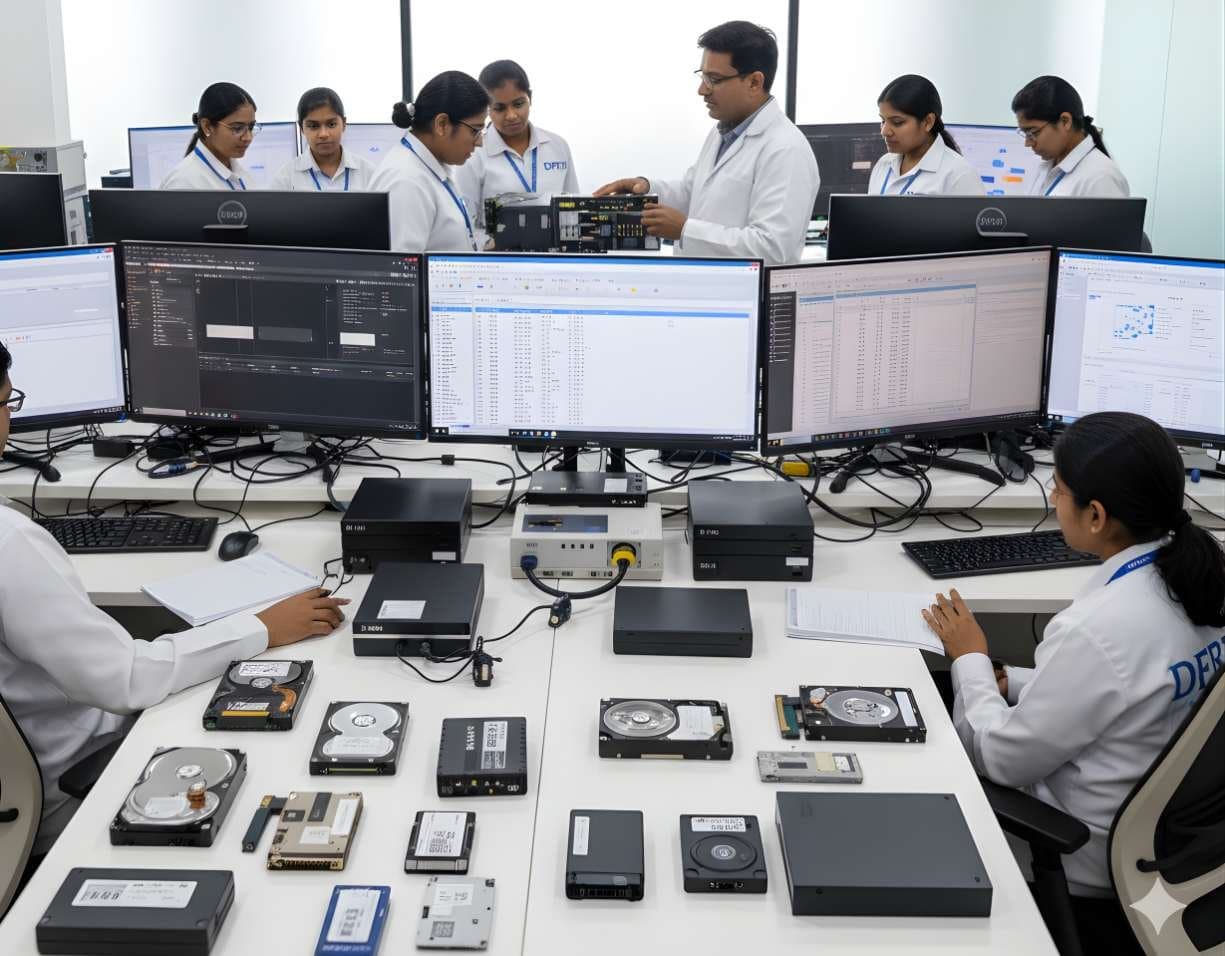
 StorageDigital Storage ForensicsHDD ForensicsImage hard drives through a write-blocker, find hidden areas and recover deleted data.
HDD Forensics
The hard disk drive is still the most common item in an evidence store. Its mechanics are old, but the rules for imaging it exactly and finding what it hides are the foundation of storage forensics.
Devices and storage7 evidence types12 tools4 coursesReviewed 2 November 2026

What it is and why it matters
A hard drive stores data magnetically on spinning platters, read by heads that float a few nanometres above the surface. The computer addresses it as a long line of numbered sectors. Because the drive writes where it is told and keeps old data until it is overwritten, a hard drive is the most forgiving storage an examiner meets. Deleted files, old partitions and fragments of long-gone documents often survive for years.
That makes imaging the critical step. A bitstream image copies every sector, including the unallocated ones, through a write-blocker that guarantees nothing is written back. Hashes of the source and the image prove the copy is exact. From then on the original goes into storage and all analysis happens on the image.
Drives also hide things. The Host Protected Area and the Device Configuration Overlay can make a drive report fewer sectors than it has. Bad sectors can stall a copy. Failing heads, stuck spindles and burnt circuit boards need a recovery lab rather than an imaging station. Knowing when to stop and hand over is part of the skill.
Types of digital evidence
- Allocated Files and File System Records
The live contents of NTFS, FAT, exFAT, ext4 or other file systems, with their metadata and timestamps.
- Deleted Files
Content whose file system record was released but whose sectors have not been reused. Hard drives keep this for a long time.
- Unallocated and Slack Space
Free sectors and the unused tails of allocated clusters, where fragments of earlier files remain.
- Deleted and Previous Partitions
Remnants of partition tables and file systems from before a repartition or reinstall, often fully recoverable.
- Hidden Areas
Sectors behind a Host Protected Area or Device Configuration Overlay that the operating system never sees.
- Drive Identity and SMART
Model, serial number, firmware, power-on hours, power cycle count and reallocated sector counts that describe the drive's history and health.
- Boot Records and Boot Code
The MBR or GPT, volume boot records and bootloaders, which can show tampering, bootkits or a changed operating system.
Devices and data sources
- 3.5-inch SATA drives from desktops and DVRs
- 2.5-inch SATA drives from laptops and external enclosures
- IDE and PATA drives from older computers still found in offices and homes
- SAS drives from servers and storage arrays
- External USB hard drives, including those with a built-in USB bridge that cannot be bypassed
- Hard drives removed from NAS boxes and RAID sets
- Drives with hardware encryption or vendor-specific enclosures
- Damaged drives with head, spindle, firmware or circuit board faults
How an examination runs
The order matters. Each step protects the one after it.
- 01Document and Label
Photograph the drive, record make, model, serial, capacity on the label and interface. Note any damage, noise or missing screws that suggest earlier opening.
- 02Read Identity and SMART
Connect through a write-blocker and read the drive's identity data and SMART attributes before imaging. Compare the reported sector count with the label and the native maximum to spot an HPA or DCO.
- 03Choose Format and Tool
Decide between raw and E01 images, compression and segment size, and pick an imaging tool or hardware duplicator suited to the drive's health.
- 04Image With a Write-Blocker
Create the bitstream image, hash the source and the image and record both values. Verify by reading the image back.
- 05Handle Bad Sectors
If reads fail, switch to a recovery-aware tool that skips bad areas first and retries later, keeping a map of what could not be read. Do not hammer a weak drive.
- 06Decide on Hidden Areas
If an HPA or DCO exists, decide under authority whether to remove it temporarily to image the hidden sectors, document the native and current maximum addresses and restore the setting afterwards.
- 07Analyse the Image
Read the partition table, mount or parse each file system, recover deleted files and partitions, carve unallocated space and build the timeline.
- 08Stop and Refer When Needed
A drive that clicks, does not spin or is not detected goes to a clean-room recovery lab with its chain of custody intact rather than being powered on repeatedly.
Tools used in this discipline
Independent profiles: what each tool does, where it stops and what you need to know before using it.
- Storage and hardwareCurrentHardware Write BlockersVarious manufacturers
A hardware write blocker sits between an evidence drive and the examiner's computer and refuses every write command. It is the first device a new examiner should understand.
- Storage and hardwareCurrentForensic DuplicatorsVarious manufacturers
A forensic duplicator is a standalone imaging device. It copies a source drive to a destination drive or image file, hashes the result and verifies it, without a computer in between.
- Computer forensicsCurrentExterro FTK ImagerExterro
FTK Imager is the free tool most learners meet first. It makes forensic images of drives, folders and memory, verifies them with hashes and lets an examiner preview evidence before committing to a full acquisition.
- Storage and hardwareCurrentPC-3000 ExpressACE Lab
The PC-3000 Express is the laboratory version of the PC-3000 family, a tester board fitted inside a workstation for hard drive diagnostics, firmware repair and data recovery.
- Storage and hardwareCurrentPC-3000 Portable PROACE Lab
The PC-3000 Portable PRO is ACE Lab's field unit for working with damaged hard drives and solid state drives. It is the portable branch of the PC-3000 family and the current generation after the Portable III.
- Storage and hardwareCurrentData ExtractorACE Lab
Data Extractor is the software that turns a PC-3000 board or portable unit into an imager for drives that are unstable, slow or partly unreadable.
- Storage and hardwareCurrentMRT Ultra 3.0MRT Lab
MRT Ultra is MRT Lab's multi-port recovery card. The current generation, released in 2026, is the MRT Ultra 3.0 Six-Port Card, used with the MRT data recovery software for firmware repair and imaging of hard drives.
- Computer forensicsCurrentX-Ways ForensicsX-Ways Software Technology AG
X-Ways Forensics is the German examination tool that runs light, starts fast and gives the examiner the raw disk alongside the parsed view. Version 21.9 was current when this page was checked.
- Computer forensicsCurrentOpenText Forensic (EnCase)OpenText
EnCase Forensic, one of the oldest names in computer forensics, is now called OpenText Forensic (EnCase). OpenText says it is the same product, renamed to fit its cybersecurity portfolio.
- Computer forensicsCurrentThe Sleuth KitSleuth Kit Labs
The Sleuth Kit, usually written TSK, is a C library and a set of command line tools for examining disk images and file systems. Autopsy is its graphical face. Working with TSK directly teaches what the graphical tools hide.
- Computer forensicsCurrentAutopsySleuth Kit Labs
Autopsy is a free, open source examination platform that puts a graphical interface and ingest modules on top of The Sleuth Kit. For a student it is the first tool that shows a whole case from image to report at no cost.
- Computer forensicsCurrentMagnet AxiomMagnet Forensics
Axiom is Magnet Forensics' main examination platform. It takes images and extractions from computers, phones, cloud accounts and vehicles into a single case and presents the artefacts side by side.
Terminology
- Sector and LBA
- The sector is the smallest addressable unit of a drive, 512 bytes or 4096 bytes. Logical Block Addressing numbers them from zero to the drive's maximum.
- Host Protected Area
- A region at the end of the drive hidden by the ATA SET MAX ADDRESS command. The operating system sees a smaller drive. Used by manufacturers for recovery images and sometimes to hide data.
- Device Configuration Overlay
- An ATA feature that can change the drive's reported capacity and features. It sits below the HPA and can hide space from it as well.
- SMART
- Self-Monitoring, Analysis and Reporting Technology. Attributes such as power-on hours, power cycles and reallocated sectors that the drive maintains about itself.
- Bad Sector
- A sector the drive cannot read reliably. Drives remap them to spares and record the count. Clusters of bad sectors signal a drive that may fail during imaging.
- Raw and E01 Images
- Raw (dd) is a plain copy of the sectors. E01 is a container format that adds compression, segmenting and embedded hashes and case data.
- MBR and GPT
- The two partition table formats. The Master Boot Record is the older scheme with a 2 TB limit. The GUID Partition Table has a protective MBR, a primary and a backup header and CRC checks.
- Clean Room
- A dust-controlled environment where a drive can be opened to swap heads or platters. Opening a drive anywhere else destroys it.
- SMR
- Shingled Magnetic Recording, a layout that overlaps tracks for density and makes the drive manage rewrites internally. It slows imaging and can behave unexpectedly under heavy reads.
Challenges and limits
What makes it hard
- Weak and failing drives can die during imaging, so the first attempt may be the only one
- Hidden areas can be missed entirely if the examiner trusts the operating system's view of the drive size
- Large drives take many hours to image and verify, which strains case timelines and storage
- USB external drives with a built-in bridge may present a different sector size or hide ATA features, and the bridge itself may encrypt
- Full disk encryption such as BitLocker turns a perfect image into an unreadable one without the key
- Older interfaces such as IDE and SCSI need adapters that fewer labs keep
- Sanitised drives give no deleted data at all, and the examiner must recognise a wiped drive rather than keep searching
Keeping the evidence intact
- Image through a hardware write-blocker that has been tested on that interface and record the test
- Record the native and current maximum sector counts before and after any HPA or DCO handling
- Hash the source and image with SHA-256 and at least one other algorithm, and verify the image before analysis
- Keep a read map for any drive with bad sectors so the report states exactly which sectors are missing
- Store the original drive in anti-static packaging in sealed evidence storage once the image is verified
Standards and legal considerations
- ISO/IEC 27037:2012
The international guideline for seizure, acquisition and preservation that hard drive imaging procedures are built on.
Read the guide - NIST SP 800-86
Describes the collection and examination of data from storage media as part of a forensic process.
Read the guide - SWGDE Best Practices
Practical guidance on computer forensic acquisition, including the handling of hidden areas and damaged media.
Read the guide - NIST SP 800-88 Rev. 2
Media sanitisation guidance. An examiner uses it to recognise what a properly sanitised drive looks like and why nothing is recoverable from it.
Read the guide
In practice
- A Drive Smaller Than Its Label
A 1 TB drive from an accountant's desktop reports 931 GB to the operating system but only 900 GB to the imaging tool. The native maximum shows a Host Protected Area of about 30 GB. Under authority the examiner images the hidden area and finds an older copy of the ledger database.
- Reinstalled to Hide Activity
A laptop was reinstalled the day before it was handed in. The image shows the new installation, but the examiner finds the previous NTFS volume's $MFT remnants in unallocated space and recovers file names, timestamps and several complete documents from the old system.
- A Clicking Drive
An external drive clicks and is not detected. Instead of retrying, the examiner documents the symptoms, seals the drive and sends it to a clean-room partner under custody. A head swap allows imaging, and the examiner proceeds from the image.
This page is educational material, not legal advice. Laws and standards change, commence on different dates and are interpreted differently across jurisdictions. Always read the official text linked on this page and take advice from a qualified professional for a real matter.
Learn it at DFRTI
Free pages explain. These courses teach it on real devices with a mentor.
StorageDigital Storage ForensicsHDD ForensicsImage hard drives through a write-blocker, find hidden areas and recover deleted data. StorageDigital Storage ForensicsFile System AnalysisRead NTFS, FAT, exFAT, ext4 and APFS at the structure level and build timelines.
 StorageDigital Storage ForensicsUSB / Pen Drive ForensicsExamine pen drives and memory sticks and prove which USB device touched which computer.
 StorageDigital Storage ForensicsRAID / NAS ForensicsImage RAID members, rebuild arrays virtually and examine NAS boxes after ransomware.
Questions people ask
Why not just copy the files?
A file copy misses deleted files, unallocated space, slack, hidden areas and the metadata that dates everything. It also changes access times on the source. A bitstream image through a write-blocker captures everything and changes nothing.
What is the point of two hash algorithms?
Belt and braces. If one algorithm is ever questioned, the other still proves the image matches the source. Most labs record MD5 or SHA-1 alongside SHA-256 for this reason.
Can data be recovered after a format?
Usually, from a hard drive. A quick format rewrites the file system structures but leaves most data in place. A full format or a wipe that overwrites every sector is a different matter.
Should I open a failed drive to look inside?
No. Dust and fingerprints on a platter destroy data. Failed drives are opened only in a clean room by a recovery specialist, and only after the decision to do so is documented.
Further reading
More in Devices and storage
Go deeper with DFRTI
Free pages explain the ground. Structured courses, lab work and a mentor take you from knowing about it to doing it on a case.